Beet Fries with Spicy Yogurt Dipping Sauce

Nearly everybody has a soft corner for French fries in their heart. And why not? Fries are the perfect blend of salty and starchy sweetness that when paired with ketchup make a great all-time favorite comfort food.

beet fries with spicy yogurt dipping sauce

Considering the calories traditional fries have, many people treat fries as a guilty pleasure. Also, we cannot ignore that having fried potatoes may not be the healthiest snacking food.

But how about swapping the potatoes with beets and using very little oil and/or an air fryer?

Now, we know that beet fries aren’t something that appeal to everybody's taste buds. However, if you change the preparation style a bit and cook the fries in an air fryer basket, your opinion will surely change. What will be created next is a very delicious dish that is not only healthy but uses very little oil and has fewer calories.

You see, an air fryer is like that magical device that lets you have your cake and keep it too. Instead of dousing your ingredients in about 50 tablespoons of oil, you’ll only need two, and yet the taste will be just as delicious! Yup - the beet fries will even be crispy and crunchy!

Why Make Beet Fries?

The naturally unique root and dirt flavor of the beets develops a sweet taste when you fry them, which not only makes them more delicious but also promotes healthy snacking. A win-win if you ask us!

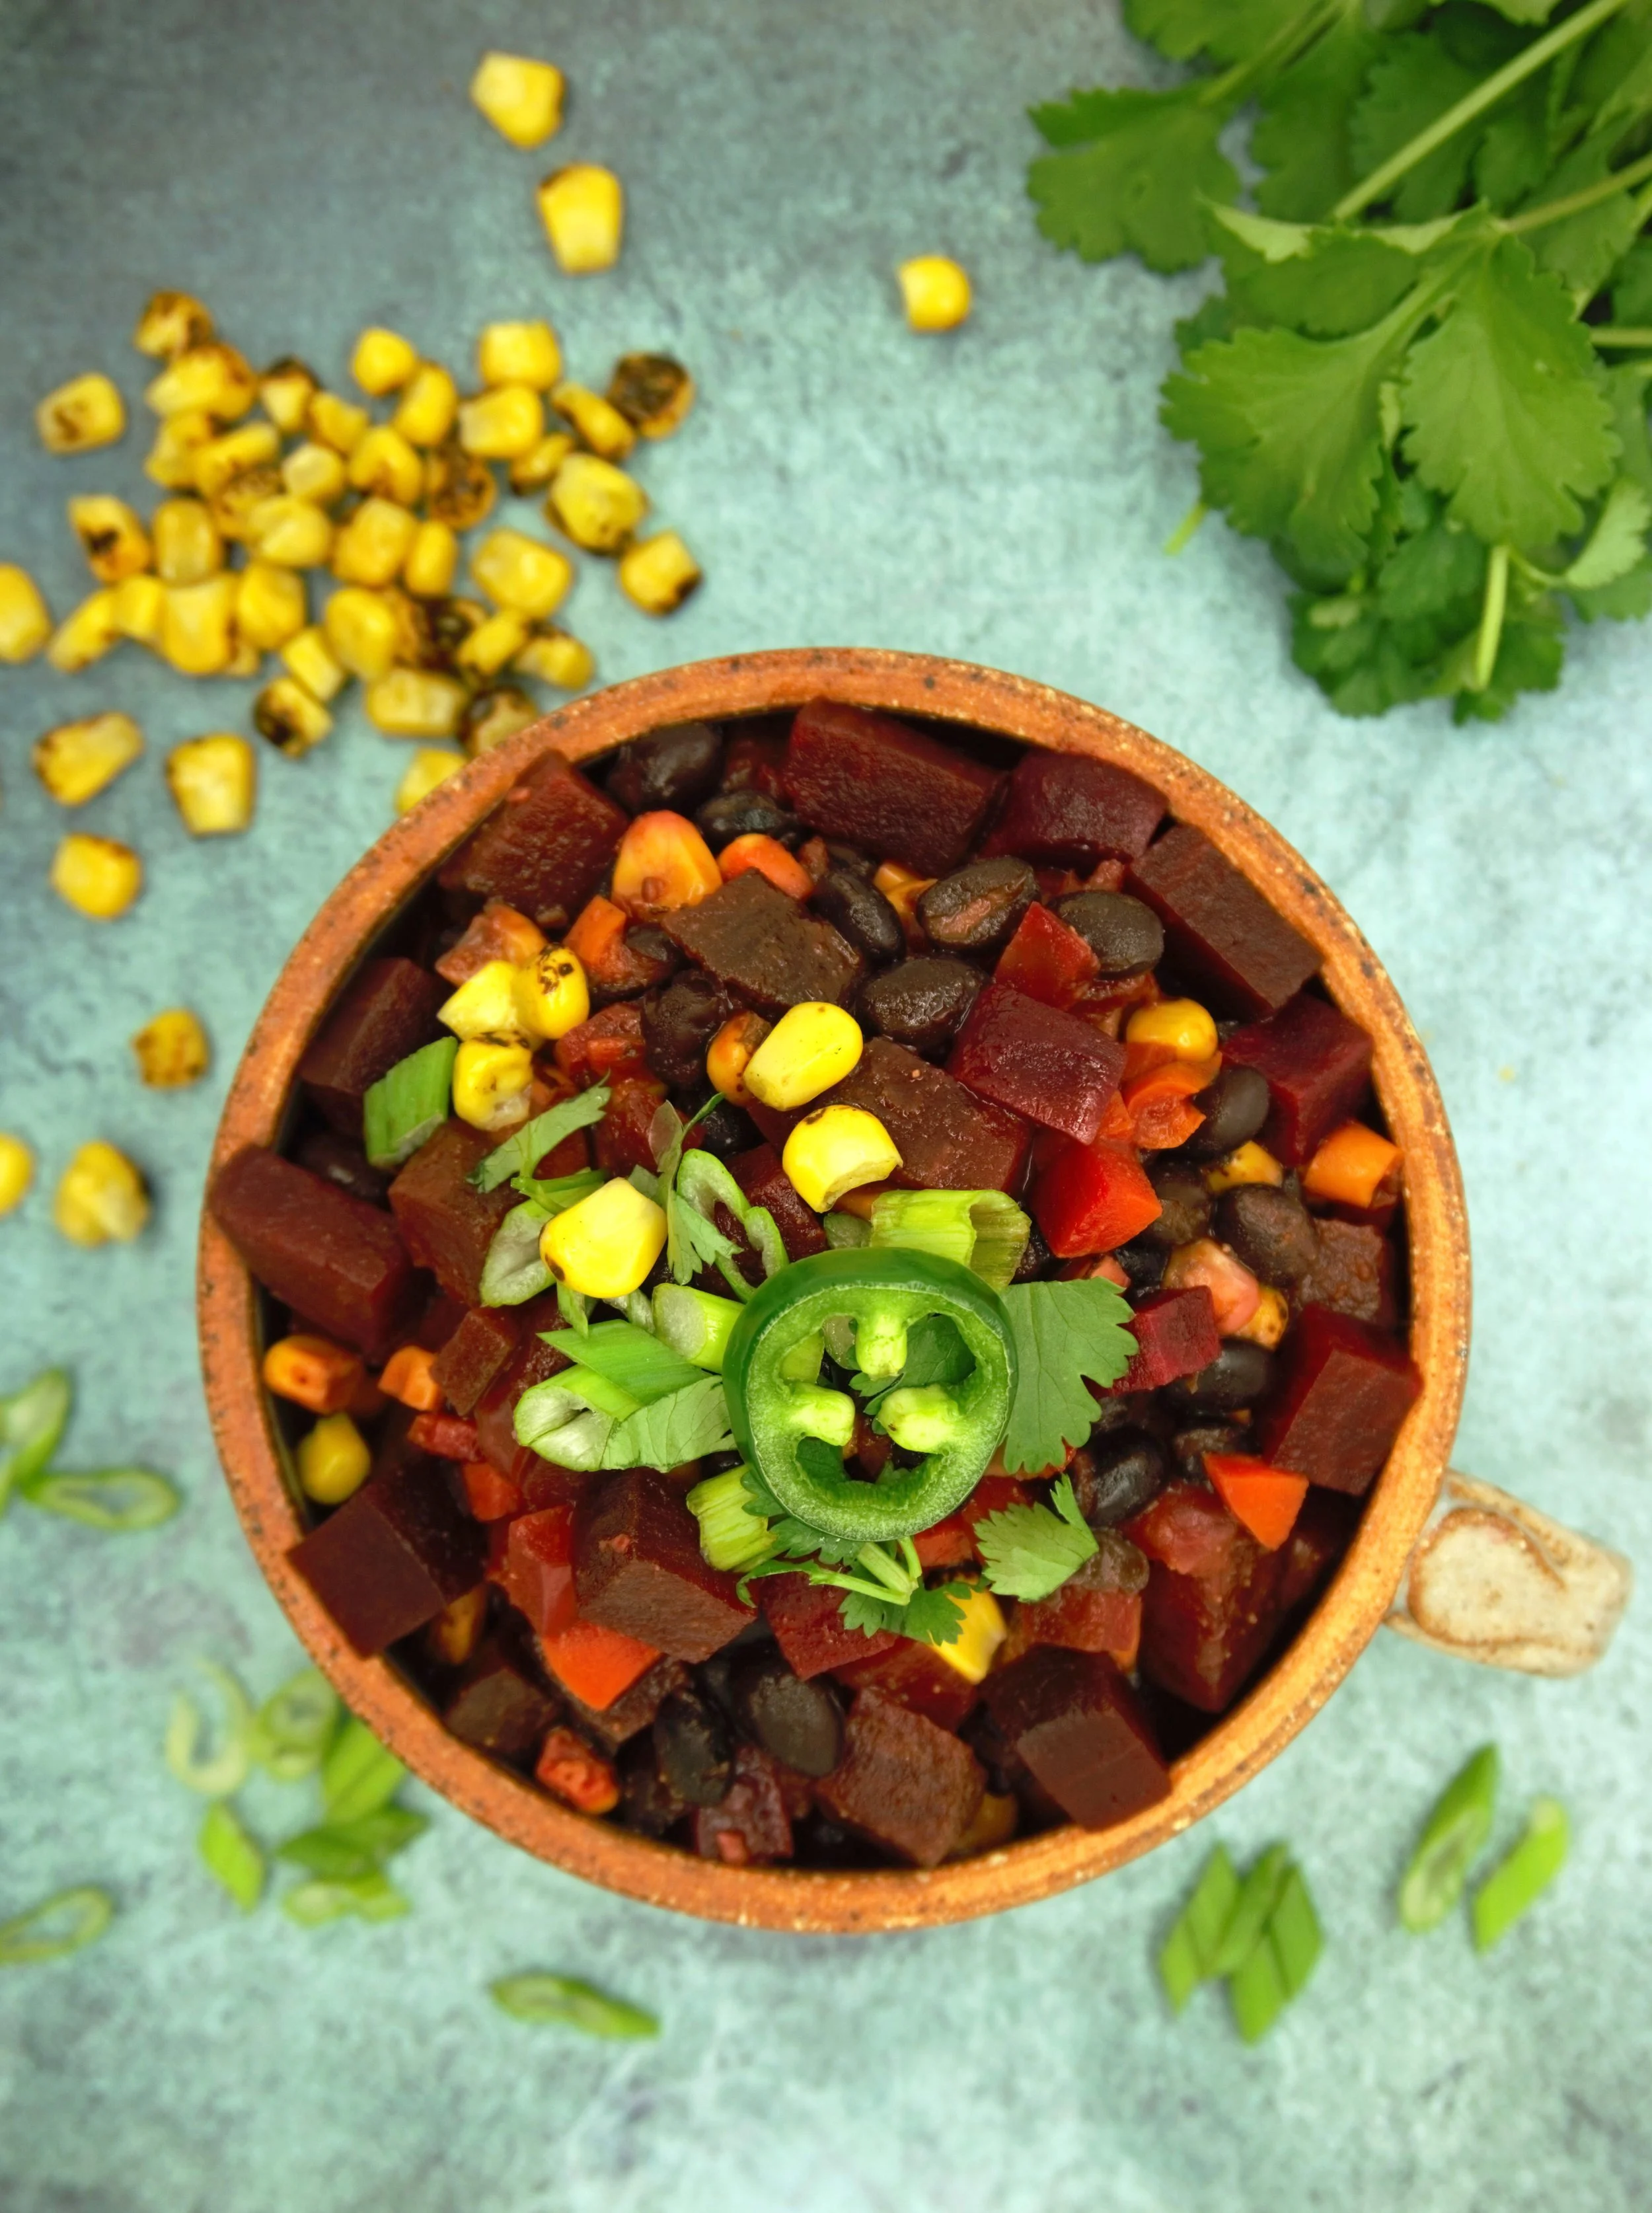
The best thing about the beet is that distinct flavor, among other benefits, and while there are golden beets too, we would highly recommend using red beets for this recipe. In addition to trying it, you can have it roasted, pickled, sautéed, or even raw!

Try this incredibly tasty, and of course, healthy recipe that is not only easy to make but also delicious to binge while watching your movies with the family or reading your favorite book.


BEET FRIES WITH SPICY YOGURT DIPPING SAUCE RECIPE


beet fries with yogurt dipping sauce pin.jpg

INGREDIENTS

for the fries

  • 2-3 large red beets

  • 2 tbsp olive oil

  • 1 tbsp white vinegar (optional)

  • sea salt, to taste

  • ground black pepper, to taste

  • fresh dill or parsley (optional topping)

for the dip

  • 1/2 cup plain Greek Yogurt

  • 1-2 tsp red pepper flakes (2 for heavy spice)

  • 2 tbsp sliced green onion

  • 1/4 tsp salt, or to taste

  • 1/4 tsp black pepper, or to taste

  • cayenne pepper, to taste

  • lemon pepper, to taste (optional)

DIRECTIONS (Beet Fries Two Ways)

Beet Fries Oven-Baked

  1. Preheat the oven to 400° Fahrenheit.

  2. Take out your beets, and give them a thorough rinsing. Cut off both ends and start cutting the beets into small 1/4-1/2 inch strips/sticks after you are done peeling them. You can also use a mandolin slicer.

  3. There are many tips to avoiding messy beet preparation, so wear gloves to avoid getting your hands pink-stained. Beets will stain most anything they touch (something that you may want to avoid), but the color will eventually wash off your hands. You may also wish to use a non-porous cutting board.

  4. Once done, blot beets with paper towel to remove moisture. Toss beet fries with a couple tablespoons of olive oil, sea salt, and black pepper.

  5. Place beet fries on a baking sheet (use parchment to prevent sticking). Cook beet fries in a single layer. Spacing them apart allows better cooking and more crunch!

  6. Bake* for about 25-30 minutes, flipping halfway through for even cooking.

  7. If fries aren’t getting crispy, turn the oven to 450 and continue baking until crisp (about another 20 minutes).

  8. Serve hot and fresh. Sprinkle with vinegar (optional), parsley or dill, and dip away!

*Every oven is different, so keep an eye on your fries and adjust baking time accordingly.

Beet Fries Air-Fryer

  1. Rather than baking the beet sticks, use an air fryer! Air fryers create crispy fries without the oil (except for what you wish to drizzle) and tend to give a more crispy fry than the oven.

  2. Preheat your air fryer to 375 degrees F, and spray air fryer basket with nonstick cooking or olive oil spray.

  3. After beets are cut into strips (see above), blot and dry beets with a paper towel to remove moisture.

  4. Toss beet fries with olive oil, sea salt, and ground pepper.

  5. In batches, place beets in a single layer into your air fryer’s basket.

  6. Start frying your beet fries until they get crunchy from the outside. Turn them halfway through frying.

  7. Cook until crisp, about 15 minutes.*

  8. When beet fries are done, set them aside to cool and sprinkle with more sea salt, vinegar (optional), fresh parsley or dill. Dip your crispy beet fries into a yummy Spicy Greek Yogurt Dipping Sauce (see above).

  9. Beet fries are best eaten fresh, but if you have any leftovers, place beet fries in an airtight container in the refrigerator. Consume within 3-4 days. Beet fries may get soggy.

*It’s important to understand and follow each individual air fryer’s instructions for frying foods. Every air fryer is different.

Written by Annabelle Carter Short.


STILL HUNGRY?

Pickled Chioggia Beets with Garlic and Dill (No Added Sugars)

Raw pickled chioggia beets with garlic and dill

Pickled Chioggia Beets are perfectly briny, savory, and crunchy with a fabulous fresh dill flavor and no added sugars. Pickled beets are super delicious and can be used in many types of brine: savory, spicy, or sweet. These pickled Chioggia Beets are delightfully savory with lots of garlic and dill!

WHAT ARE CHIOGGIA BEETS?

Did you know that there are various beet varieties and types? Red beets are only one type of beet variety and beets come in all different colors and shapes. Even the beet taste can vary between varieties.

The gorgeous pink and white striped Italian heirloom variety (Chioggia Beet) is pronounced “kee-OH-gee-uh” and tastes similar to red beets. Also known as the Candy Cane Beet, Bull’s-Eye Beet, and Candy-Stripe Beet, these vibrant beets are sweet and earthy. Plus - these beauties contain an amazing secret. When sliced, they display contrasting vibrant pink and white colors, like a striped candy-cane. When cooked, the beetroot flesh turns pale pink.

Chioggia beets are gorgeous with their vibrant pink and white striped hues, and since they don’t bleed as much as red beets (and make less mess), many people prefer preparing pink Chioggia beets rather than red beets.

What do Chioggia beets taste like? It depends who eats them. Many people say this heirloom variety has a more mild and sweeter taste than red beets (which most people are familiar with eating or seeing in the markets); however, since this variety does contain higher levels of geosmin, if you are not a fan of the unique “earthy” flavors associated with beets, this variety may taste more like dirt to you. Taste buds vary, so give it a try!

Related: Hate Beets? Science May Have the Answer (the truth about why beets taste like dirt)

CHIOGGIA BEET HEALTH BENEFITS

Just like other beet varieties, the candy-cane striped Chioggia beet is a wonderful source of antioxidants and contains high levels of minerals, vitamins, fiber, and minerals such as potassium, manganese, and magnesium. The Chioggia beetroot is also a fantastic source of folic acid and is high in iron!

CAN CHIOGGIA BEETROOT BE EATEN RAW?

Yes! Like red or golden beets, you can eat Chioggia beets many ways including raw or roasted in salads, fermented, or pickled.

Pickled Chioggia beetroot can be made many different ways, but this recipe is made with raw and roasted beets. For a softer more tender texture, roast beets first before pickling. Thinly slice Chioggia beets and pickle them raw for a crunchier texture. Using a mandoline slicer works best.

When Chioggia beets are cooked, they become a pale pink color. Raw Chioggia beets are pink and white striped, so if you want to retain the vibrant candy-cane hues and stripes, eat Chioggia beets raw. Coating these beautiful beets with lemon juice or vinegar will also help maintain the color and unique candy-cane striped pattern.

Chioggia HEART beets and brine also work wonderfully to make a Pretty in Pink Pickled Beet Dirty Martini. This spin on a classic martini is absolutely delightful!

Related: 10 Surprisingly Tasty Ways to Eat Raw Beets


PICKLED PINK CHIOGGIA BEETS WITH GARLIC AND DILL RECIPE

(NO ADDED SUGARS)


Just Beet It Notes: You can pickle Chioggia beets two ways: cooked for a smoother texture and light pink color or raw for a crunchy taste and to retain the pink and white stripes. These are refrigerator pickled beets. Eat after 24 hours and enjoy within one month.

INGREDIENTS

  • 1-2 large bunches of Chioggia beets* (save the greens for a nutritious sauteed side-dish)

for the pickled beet brine

  • 2 cups of water

  • 1 cup white vinegar or apple cider vinegar

  • 1 - 1 1/2 tablespoons kosher salt (flavor to taste)

  • 1 teaspoon coriander seeds

  • 1-2 tbsp fresh dill (add more for a stronger dill flavor)

  • 6 cloves garlic, smashed to enhance flavor

DIRECTIONS: making the brine

  1. In a saucepan over medium-high heat, combine water, vinegar, salt, garlic, and coriander seeds. Bring to a boil.

  2. Simmer ingredients for a few minutes. Take the pan off the heat and allow to cool a bit.

  3. Roast beets or slice raw (your preference - see below).

  4. In mason jars, add fresh dill and beets and pour brine over beets.

  5. Add more fresh garlic for a super savory flavor.

  6. Refrigerate pickled Chioggia beets.

DIRECTIONS: Pickled Raw Chioggia Beets

  1. Gently scrub beets, removing stems and leaves (save for another delicious dish).

  2. Thinly slice beets using a mondoline slicer.

  3. Cut heart shapes using tiny cookie cutters (if preferred)

  4. Put your beets in a mason jar. 

  5. Pour brine over beets (see brine directions above).

DIRECTIONS: Cooked Pickled Chioggia Beets

  1. Place beets in a large pot with water to cover on the stove.

  2. Bring to a boil and cook beets until tender and easily pierced with the tip of a knife (about 30-35 minutes depending on the beetroot size).

  3. Drain the beets, cool and peel.

  4. Thinly slice beetroot and then cut heart shapes (if preferred) using tiny cookie cutters or cut beets in quarters.

  5. Put your beets in a mason jar. 

  6. Pour brine over beets (see brine directions above).

savory pickled chioggia beets with garlic and dill (no added sugars)

YOU MAY ALSO LIKE

Homemade Fruit and Vegetable Gummies with Beets, Strawberries, and Cherries (Vegan)

Real Fruit and VEgetable Gummies with Beets Strawberries and Cherries 2.jpg

Homemade Fruit and Vegetable Gummies Can't Be "Beet"! They are fruity, naturally sweet, easy to make, and taste like real fruits and vegetables. These fresh fruit and vegetable gummies contain simple ingredients using natural sugars from beets, strawberries, and cherries (optional maple syrup if you want a sweeter taste) and vegan and vegetarian-friendly gelatin. Yeah. Beet, Strawberry, and Cherry Gummy snacks are awesome!

Many store-bought fruit snacks and gummies contain unhealthy ingredients (many that we can’t even pronounce and loads of sugars (high-fructose corn syrup often makes an appearance), so it is great fun to make gummies at home with only a few ingredients and using nature's natural fruits and vegetables. Beets, strawberries, and black cherries are rich in Vitamin C, antioxidants, and fiber, so this snack is a total win.

Although there are many different types of gelatin to make gummies, gelatin is often derived from beef, so this recipe utilizes Agar-Agar powder, a vegetarian and vegan substitute.

What is Agar (also known as Agar-Agar)?

Agar is a vegetarian jelly-like substance made from red algae that contains little to no calories, carbs, sugars, or fat. It’s a great addition for making healthy snacks. Agar can also be used in vegetarian and vegan recipes as a thickening agent for soups, puddings, and sauces. You may even wish to add fruit and vegetable gummy bears (like Boba) to your iced teas, milk teas, and/or cocktails. Yum!

Let’s get real.

We hate to disappoint you, but these gummies are not candy. Yeah. Most gummy bears and even some fruit snacks contain high levels of sugar. This recipe does not contain that same level of store-bought sweetness; however, these gummies ARE delightfully tasty! These fresh fruit and vegetable gummies have a very pleasant fruity taste. They taste like real strawberries and cherries with a hint of beet. Strawberries, cherries, and beets pair well together, and the colors are gorgeous. The beautiful beetroot can be a tad “earthy” as some say, but the sweetness from berries and cherries is a fantastic balance. However, if you prefer a sweeter taste, use Grade B Maple Syrup (or sweetener of your choice) as it’s packed with nutritious trace minerals, such as potassium and magnesium.

Fresh Fruit and Vegetable Beet Strawberry and Cherry Gummies 18 edit.jpg

Guess what? Homemade Fruit and Vegetable Gummies are actually easy to make, once you have the molds and gelatin on hand. Plus - even your kiddos may get jazzed about the process of filling the silicone molds and then popping out the gummies to eat as a snack.

Heart molds are perfect for Valentine's Day (and any day as they are so darn cute), but there are limitless options for creative mold designs: bears, sea shells, truffles, dinosaurs, palm trees, zombies, robots, and even Legos. Adult gummies are also a “thing” now as you can make gummies with CBD oil and even alcohol.

Don’t have molds? No problem! you can use a glass dish or even a square cake pan. Refrigerate ingredients in the fridge and then cut into squares or small heart or star shapes using a small cookie cutter. Once you make homemade gummies, you will see how easy the process is and you may be hooked!

Who’s ready to make some gummies?


HOMEMADE FRUIT AND VEGETABLE GUMMIES (FRUIT SNACKS) WITH BEETS, STRAWBERRIES, AND CHERRIES (VEGAN) RECIPE


Fresh Fruit and Vegetable Beet Strawberry and Cherry Gummies 25 pinterest.jpg

INGREDIENTS

Beet and Strawberry Gummies Recipe

(makes about 25: heart mold is 1.1 x 1 x 0.9 inch)

  • 1/2 cup water

  • 1/3 cup diced raw beets (or beet juice)

  • 1 1/2 cups strawberries, fresh or frozen (defrosted) and stems removed

  • 1/3 cup diced raw red beet (or beet juice)

  • 1 1/2 tbsp maple syrup : add more for a sweeter taste and/or preferred sweetener (optional)

  • 1 tsp lime juice

  • 2-3 tsp Agar Agar Powder**


Beet and Black Cherry Gummies Recipe

(makes about 50 total: gummy bears: 24 / Circles: 25+: 1.1 x 1 x 0.9 inch - gummy bears a tad smaller)

  • 1/4 cup water

  • 1/2 cup black cherry juice (no sugar added)*

  • 1/4 cup red beet juice (no sugar added)

  • 1 1/2 tbsp maple syrup (optional)

  • 2-3 tsp Agar Agar Powder**

*This recipe uses pure black cherry juice (no sugar added) because fresh black cherries are not always accessible in the store. Also, if you don’t have access to beet juice, you can blend raw beets with cherry juice until liquid. Strain the chunky beet parts, using the remaining liquid for the gummies. Most markets sell beet juice either fresh and refrigerated or on the shelves with other juices.

**2 tsp makes a softer gummy and 3 tsp makes a more firm gummy texture.

Fresh Fruit and Vegetable Beet Strawberry and Cherry Gummies 12 edit.jpg

DIRECTIONS

This recipe utilizes the whole fruit, but if you want to shorten the process, use real strawberry and beet juice with no added sugars. Both can be found at grocery stories.

  1. Puree strawberries and beets in high speed blender (you may also juice them if you wish). If you don’t have a high-speed blender like a vita-mix, you will want to squeeze blended ingredients through a sieve to strain the chunky pieces keeping the remaining beet and strawberry liquid for the gummies.

  2. Mix blended beets and strawberries with lime juice and maple syrup (optional).

  3. In a small saucepan on the stove, let gelatin “bloom” as its called before adding heat. Add 2-3 tsp agar powder (2 tsp for soft and 3 tsp for more firm gummies) to 1/2 cup water. Let sit for about 5 minutes.

  4. Add the fresh beet and strawberry puree/liquid to the pan with the agar powder and water. Add lime juice and maple syrup or sweetener (if using). Whisk to combine all ingredients.

  5. Heat ingredients in pan over low to medium heat, whisking until agar is completely dissolved. Ingredients will start to thicken.

  6. When agar is completely dissolved and ingredients are slightly thickened, remove pan from heat. Don’t overheat the gelatin mixture. You want the mixture to be warm but not burned, clumpy, or too hot to touch. Heat for about 2-3 minutes.

  7. Taste the liquid before placing in molds. Add more sweetener if desired.

  8. Using a small eye dropper (preferred) or small spoon, fill molds. Be careful not to overfill. If you don’t have molds, you may pour mixture into a square glass pan (or baking pan) lined with parchment.

  9. These gummies harden very quickly! If the dropper becomes clogged, rinse with water, stir the mix, and continue.

  10. Place in refrigerator for about 15-30 minutes. This mixture is quick to harden in the silicone molds, but if you find that the gummies are not set, keep molds in fridge for another 30 minutes.

  11. Remove gummies from fridge and carefully pop out of the molds. They should come out very easily. If using a glass pan rather than molds, cut mixture in squares or use a small cookie cutter to make shapes.

  12. Beet, Strawberry, and Cherry Gummies can store in an airtight container in the refrigerator for about 1 1/2 weeks. Enjoy!

To make Beet and Black Cherry Gummies, Start with Directions #3 and sub cherry juice for strawberry puree/liquid. Add lime juice if you wish, but it adds a more tart flavor to the cherry and beet combo.


STILL HUNGRY?

Beet Chocolate Latte Energy and Protein Bites (No Bake/Vegan/Gluten-Free)

vegan+beet+chocolate+latte+energy+bites+with+saku+blends+pinterest.jpg

Beet Chocolate Latte Energy and Protein Bites are the perfect pre-workout snack, quick and easy breakfast fuel, or delicious afternoon nibble. Packed with superfood goodness, these energy bites are a fantastic fusion of Saku Tea Ruby Cocoa Beetroot Latte blend, maca root powder, dates, almond butter, and coconut equaling a naturally sweet and earthy flavor. Yum!

This recipe is vegan, gluten-free, paleo-friendly, and sugar-free (no added sugars) offering a good balance of natural carbs, healthy fats, fiber, and protein. Plus - there is no baking involved!

Energy bites (or energy balls) seem to be popping up all over the internet and local juice/smoothie bars, and we totally understand the craze as we are in love with Beet Chocolate Latte Bites. These flavorful bites contain incredible superfoods for boosting energy, offering antioxidants, providing vitamins and minerals, and reducing inflammation.

Maca Root, a Peruvian superfood naturally energizes, enhances moods, and helps balance hormones. Other energy bite ingredients include dates, almond butter, raw cacao, and a SAKU Beet Chocolate Latte Blend. Dates provide excellent minerals, fiber, and natural sugars, making a delicious no-added sugar sweetener. Balance the natural sugars and carbs with almond butter and protein-powder for healthy fats and protein. This recipe also uses coconut flour (a dense gluten-free flour) and flax meal, which provides a healthy dose of Omega-3’s. If flax meal isn’t part of your diet, eliminate flax meal and add gluten-free oats or some extra coconut flour.

For the delicious BEET CHOCOLATE LATTE taste, use Saku Ruby Cocoa Beetroot Latte Blend. We are hooked on Saku’s organic wellness superfoods, especially the beet latte blends! These delicious organic blends are packed with nutrients and flavors and contain no added sugars. Ruby Cocoa (used for this recipe) includes: beetroot, raw cocoa, cocoa, roasted dandelion root, cardamon, and cinnamon. This blend is a natural energizer and tastes like earthy chocolate. Yum!

beet chocolate latte energy and protein bites

Energy bites are easy to make but can be a tad finicky with texture. Be patient! If your energy bites are too moist or sticky, add more coconut flour, flax meal, or gluten-free oats (This recipe doesn’t use oats, but you can add them for extra fiber and flavor).

The great thing about latte bites is that they are caffeine-free, so they are safe for children. However, if making Beet Chocolate Latte Energy Bites for kiddos, remove maca as it may not be suitable for some children.

Top (or roll) your energy bites with coconut shreds, crushed almonds, gluten-free oats, raw cacao nibs, or crystallized ginger. If you are a fan of raw cacao (it can be bitter to some), sprinkle raw cacao on top of the bites or roll your balls in raw cacao powder.

Are you a fan of energy bites? What are your favorite ingredients? Comment below.

This post contains sponsored content brought to you by SAKU Tea. We received free product to review, but all opinions presented here are 100% our own. For further information please see our Disclaimer page.


Beet Chocolate Latte Energy and Protein Bites Recipe

(No Bake / Vegan / Gluten-Free)

beet chocolate latte energy and protein bites vegan and raw.jpg

INGREDIENTS (serving: about 18-20 balls)

  • 10 medjool dates

  • 1/4 cup almond butter

  • 1 tsp vanilla extract

  • 2 tsp SAKU Beet Cocoa Latte*

  • 2 tbsp raw cacao

  • 1 tbsp maca

  • 2 scoops vegan protein-powder (Vega or Plantfusion)

  • 1/2 cup flax meal (gluten-free)

  • 1/4 cup coconut flour

OPTIONAL TOPPINGS: coconut shreds, dark cacao chips or nibs, gluten-free oats, ground almonds

*We used 2 tsp for a balanced flavor or ingredients, but you can add 1 more tsp for extra beetroot latte taste!

DIRECTIONS

  1. Remove pits from dates and soak in water for at least 30 minutes to soften. Once softened, drain dates and add to food processor.

  2. Add remaining ingredients to food processor and blend. Don’t over blend as the texture will be too sticky and thin. For a chunkier texture, process only dates and almond butter and then add to a bowl and mix with remaining dry ingredients.

  3. Texture should be chunky and sticky. If too sticky, add a little more coconut flour or flax meal.

  4. With a teaspoon or your fingers, scoop the mixture and roll into small balls. If too sticky, coat hands with coconut flour. Roll the mixture into small balls. Roll each individual ball into coconut shreds.

  5. Place balls on parchment paper in an airtight container in the refrigerator until serving. These are best refrigerated for an hour or two before serving. Energy bites will keep in the fridge for at least a week, or you may freeze them in a freezer-friendly container for a few months. Enjoy!


STILL HUNGRY?

Roasted Beets and Vegan Cashew Cream Cheese Crostini

vegan roasted beets and cashew cheese crostini recipe .jpg

Your heart will “beet” for cashew cream cheese! This delightful vegan appetizer is filled with dairy-free nutty goodness, sweet earthy beets, and toasted crunchy bread. We are obsessed with homemade cashew cream cheese, and you will be too! The nutty flavor of cashews with a hint of lemon is a scrumptious and nutritious addition to toasted breads, bagels, and crackers.

Crostini (Italian for “little toasts”) is usually made with a fresh baguette and sliced about 1/4 inch thick (long or short). Brushed with olive oil (and sometimes rubbed with garlic), crostini can be topped with endless ingredients, such as spreads like cream cheese, tomato and garlic (to make bruschetta), and roasted vegetables. Roasted beets with basil is always a winning combination.

This roasted beet recipe features heart beets (diced roasted beets work well too) to celebrate the beet’s healthy heart benefits. The beautiful heart-shaped roasted beets are perfect for Valentine’s Day, the month of February (It’s American Heart Month), and all year long! Both beets and cashews offer incredible nutrition for boosting heart health and helping prevent cardiovascular disease. We can always give some extra love to our heard-working hearts and cardiovascular systems.

Are you a fan of cashews? Studies show that adding more nuts, like cashews, to your diet may reduce blood pressure and cholesterol levels to help lower your risk for cardiovascular disease. Additionally, cashews are packed with vitamins, antioxidants, and minerals. Minerals, such as iron, selenium, magnesium, and copper are vital for healthy body functions; cashews are a rich source of these essential minerals.

vegan crostini with roasted beets and cashew cream pinterest.jpg

Cashews are a fatty nut, but they contain “good fat”! This type of healthy fat (monounsaturated fat) improves cardiovascular function and may help prevent heart disease. Awesome! Besides improving heart health, healthy fats are important for many reasons as they reduce cravings, reduce inflammation, reduce belly fat (yup - eating foods with fat doesn’t equal adding fat to your body), and reduce the risk of diabetes.

As with most things in life, moderation is key. Cashews are high on the caloric intake, so if you’re a calorie counter, then you may want to eat cashews in moderation. The benefits of healthy fats, minerals, vitamins, and antioxidants are definitely worth adding a few extra calories to your diet. At least, we think so!

Vegan Cashew Cream Cheese can also be spread on your morning bagel or breakfast sandwich, used atop gluten-free crackers, and even thinned to make a cashew cream for tacos.

For more healthy nut spreads and dips, try Vegan Beet Walnut Dip and Beetroot and Garlic Hummus.


Roasted Beets and Vegan Cream Cheese Crostini Recipe

Roasted Heart Beets with Vegan Cashew Cream Crostini.jpg

INGREDIENTS

  • 1 fresh baguette, sliced 1/4 inch thick (slice at a slight angle for longer pieces)

  • 1/4 cup extra virgin olive oil

  • 3/4 - 1 cup vegan cashew cream (see below)

  • 1/2 cup Roasted Heart Beets

  • a handful of fresh basil leaves

DIRECTIONS

  1. Preheat oven to 350 degrees.

  2. Lightly brush both sides of baguette slices with oil and place them on large baking sheets.

  3. Bake baguette slices until golden, about 10 minutes (longer for extra crispy toasted bread). For even toasting, flip over slices halfway through baking.

  4. Once cooled on baking sheets, top each crostini with toppings. Cashew cream and roasted beets may be cool if just removed from the fridge. If you prefer warm toppings on your crostini, add cashew cream, basil leaves, and heart beets to each slice and place back in the oven for 2-3 minutes to warm.

RECIPE MODIFICATION

If adding regular roasted beets (not heart shaped ones), roast beets (1-2 small to medium) for 20-25 minutes. After beets have cooled (to the touch), remove skins and dice beets or make a beet puree. Spoon diced beets or puree onto each crostini. Enjoy!


roasted beets and vegan cashew cream crostini recipe.jpg

VEGAN CASHEW CREAM CHEESE INGREDIENTS

  • 1 cup raw unsalted cashew nuts*, soaked overnight

  • juice of 1/2 lemon (or whole lemon for extra lemon flavor), about 1-2 tbsp

  • 1/4 tsp salt, more to taste

DIRECTIONS

  1. Soak the cashews overnight. Rinse them well and add them to a blender with a splash of water, lemon juice, and salt.

  2. Start blending, scraping down the walls of the blender regularly. Add more water as needed to make the cashew cream thick and smooth. Be patient! You may need to scrape the walls of the blender a few times, but take your time adding a dash of liquid periodically. Adding too much water or lemon juice will make your cashew cream cheese runny.

  3. Season with salt and more lemon juice if preferred.

  4. Cashew cream can be served immediately but is best chilled for a few hours before serving. Cashew cream can be made in advance and stored in an air-tight container in the fridge for up to 5 days.

*Cashews (unsalted and salted) can be found in most stores or you can buy cashews online.


STILL HUNGRY?

Baked Beet Greens Chips

Beet Greens Chips on cookie sheet 1.jpg

We adore snacks and everything green, so we’ve been big fans of homemade kale chips for a while. Guess what? Other greens make fantastic chips too! We swapped kale for beet greens in this delicious recipe as beet leaves offer THE perfect surface and taste for crispy Baked Beet Greens Vegetable Chips.

Vegetable chips are fun and easy to make, especially if you are wondering what the heck to do with beet greens, the leafy beetroot tops. These crispy snacks are great for family movie nights, as a unique appetizer for parties, and well - any time because they are so darn delicious!

WHY EAT BEET GREENS?

Beet greens offer numerous nutrients, such as Vitamins A & K along with vital trace minerals, like potassium, magnesium, and manganese. Creating chips from the leaves makes a healthy AND tasty snack!

baked beet greens chips - vegan and GF.jpg

Seasonings are endless for these delicious chips. Add nutritional yeast for a vegan Parmesan cheese flavor or chili powder and a dash of lime for a little spice. Drizzling different flavored oils, like truffle oil and garlic adds some unique pizzazz, and of course, the simple olive oil with sea salt and black pepper is always a winner. Coconut oil and curry powder with sea salt is also a tasty topping for veggie chips.

For more ways to use beet greens or beet stems, peruse 15 Creative Ways to Use Beet Greens and Quick-Pickled Beet Stems. Beet stems are edible and filled with nutrients!

Looking for more healthy green snacks or lunch ideas? Try Broccoli Fritters: The Easiest Vegetarian Lunch by One Sweet Harmony. Yum! This recipe is easy to make and family friendly.

Have you tried Baked Beet Greens Chips before? What are your favorite seasonings? Comment below!


BAKED BEET GREENS CHIPS (KETO / VEGAN / PALEO)


Baked Beet Greens Chips.jpg

INGREDIENTS

Option 1

  • 1 bunch of beet greens

  • olive oil

  • sea salt (or smoked sea salt), to taste

  • black pepper, to taste

Option 2

  • 1 bunch of beet greens

  • coconut oil

  • curry powder

  • sea salt, to taste

DIRECTIONS

  1. Pre-heat oven to 350 degrees.

  2. Gently wash beet greens (use organic beet greens when possible) and dry them with paper towels. Dry leaves become more crispy! Detach the stems from the leaves with with a knife or scissors. Save the beet stems for a delicious Quick-Pickled Beet Stems recipe.

  3. Place beet greens on a baking sheet lined with parchment paper. Avoid stacking leaves.

  4. Lightly coat the greens with oil. Sprinkle salt and pepper on beet greens, or for option 2, lightly coat beet greens with sea salt and curry powder.

  5. Bake beet greens for approx 5-10 minutes. Check after 5 minutes. Beet leaves can burn quickly, so monitor their progress. Since some ovens run hotter than others, it’s best to check on beet greens every 5-6 minutes.

  6. Flip the greens over and bake for another 3-4 minutes or until beet greens are crispy.

  7. When cool enough to handle and eat, snack away! Beet Greens Chips are best eaten fresh from the oven or within a few hours as sometimes they lose their crispness. Enjoy!


STILL HUNGRY?

Beet Sauerkraut with Ginger and Garlic

Beet Kraut with Ginger and Garlic

Do you pamper your gut? Unbalanced gut flora can impact mood, weight, immunity, energy, brain function, and skin. Yup. A healthy gut is a happy body and mind! 

There are a number of ways to improve your gut health through yogurts, kombucha, kvass, sauerkraut, etc. Fermented foods improve gut health by providing important probiotics and enzymes. Plus - foods that are fermented aid digestion, may prevent some diseases, and are good sources of many vitamins. Bring on the probiotics! 

Probiotics (living microorganisms) protect against hostile bacteria to prevent infection and help improve digestion and absorption of food and nutrients. A great source of probiotics is found in sauerkraut, cut cabbage that is fermented by various lactic acid bacteria. Translation? Healthy microorganisms! Kraut is filled with many incredible health benefits such as boosting immunity, aiding digestion, creating good bacteria, and more. Adding the detoxifying magic of beets with garlic and ginger, this BEET, GINGER AND GARLIC KRAUT is both delicious and healthy. 

Homemade Beet Kraut with Garlic, Ginger, and Cardamon

I am a recent kraut converter. Growing up in a family where sauerkraut was a favorite, I was not a fan, and often turned up my nose (mostly because of the pungent smell) to eating kraut. Now, I am absolutely madly in love with beet kraut. Perhaps it's because the beet adds a balanced sweetness to cabbage or perhaps since this recipe includes ginger and garlic, two ingredients that I adore, Beet Sauerkraut has a special place in my heart. Besides the amazing nutrtional benefits from kraut, there is also something quite rewarding about growing healthy bacteria in the kitchen because I am nurturing live wee beasties of goodness. Wahoo! 

Making homemade kraut is quite simple. If you have extra mason jars to spare, double or triple the batch and seal the lids (canning style) when done fermenting to save for later. If you're already going through the process, you may as well make a big batch.

Enjoy beet kraut on its own or added as toppings to tacos, omelettes, and sandwiches. Kraut atop freshly sliced avocado is also brilliant!

Do you have a favorite fermented foods recipe? Send it over! I am always looking for new ways to ferment foods and make my gut flora shimmy with joy. Cheers! 


BEET AND PURPLE CABBAGE SAUERKRAUT WITH GINGER AND GARLIC


Beet Kraut with Ginger and Garlic .jpg

INGREDIENTS

  • 1 large head of purple/red cabbage, raw and shredded

  • 3-4 large red beets (about 2 cups), raw, peeled, and grated

  • 2-3 tbsp kosher, pickling, or sea salt*

  • 3-4 garlic cloves, minced or grated

  • 1-2 inches fresh ginger, minced or grated (1 inch is mild and 2 inches is more spicy)

  • 1 tbsp caraway seeds (optional)

  • 1 tbsp dried dill weed (optional)

  • Water (for brine if needed)

Kitchen Tools Needed

  • Large bowl

  • Wide-mouth mason jars

  • Fermenting air-lock kit (optional)

  • Wooden spoon

*This recipe accounts for 1 extra tbsp of salt for salt brine if needed. Since everyone's taste buds are uniquely different, you may wish to alter the salt levels in this recipe based on your preferences. To test your salt-lovin' ways, taste the brine in the bottom of the bowl after mashing mixture. The brine should definitely be salty, but if you prefer more, add additional salt to suit your palate. 

DIRECTIONS

  1. Finely (or chunky if preferred) slice, grate, or chop cabbage and beets (for tips on less messy prep, click here).

  2. Place beets and cabbage in a large bowl and sprinkle 1 tbsp salt over mixture. Let sit for 15-20 minutes.

  3. Add additional tbsp of salt. Massage (mash, press, or crush) mixture for about 10 minutes to get the juices flowing! Massaging mixture should create a lovely beet cabbage juice at the bottom of the bowl.

  4. Mix in garlic cloves, fresh ginger, caraway seeds (optional) and dill (optional).

  5. Leave ingredients in bowl on counter for about an hour until cabbage has wilted a bit and released more salty juice (water).

  6. Once cabbage/beet mixture is watery, pack mixture and juice into clean mason jars. Firmly pack down mixture (a wooden spoon works well). You want to eliminate as many air bubbles as possible. Keep packing until the jar is almost full (leave at least 1-2 inches at the top for expansion).

  7. Liquid should lightly cover mixture. If there is not enough liquid to cover the cabbage, mix 1 salt tbsp with 4 cups water, and add brine to bring the water level enough to cover cabbage.

  8. If cabbage floats, use a glass weight or piece of cabbage core to hold it down.

  9. Affix jar lids and set aside in room temperature (no direct sunlight) for about ONE WEEK.

  10. Placing jars on a dish or tray helps eliminate any messy leaking or spilling over. Additionally, "burping" the jar every day or so releases pent-up gasses. To do this, remove the lid (preferably over the sink), release the gasses, and also press down any floating pieces. You don't want to introduce any non-clean bacteria to your mixture, so make sure any utensils or fingers used are clean and sterile!

  11. Taste your kraut after one week. If it has reached the right amount of flavor and tang, store jars in the refrigerator. If you wish to ferment your kraut further, leave at room temperature for a few more days or another week.


STILL HUNGRY?

Beet, Carrot, and Herbs Gluten-Free Crackers

Beet and Carrot with Herbs Gluten-Free Crackers

Are you a fan of crunchy snacks? Want to add more veggies to your diet? Homemade Beet, Carrot and Herbs Gluten-Free Crackers are filled with root vegetables, herbs, and spices providing a healthy and delicious way to increase your veggie intake and satisfy your snack cravings.

Beet, Carrot and Herbs Crackers are free of gluten, preservatives, hidden sugars, and artificial ingredients. Besides the fabulous crunch quality for snacking, these crackers also include extra nutrients with thinly shredded veggies. Beets and carrots contain Vitamin C and A, fiber, minerals, antioxidants, and more. Additionally, these crackers are packed with deliciously healing and healthy herbs and spices, such as thyme, cumin, and turmeric. These amazing ingredients offer anti-inflammatory properties and immunity boosting benefits. Your body will do a happy dance for this nutrient-rich snack!   

Let's talk reality. Yes- creating crackers from scratch does require a tad more time and investment than picking up a box of crackers from the market, but these crackers are filled with simple healthy-ingredients and baked with love! Plus - there is something super rewarding about baking from scratch, especially when a rolling pin is involved.

Pair crackers with your favorite hummus or dip or serve crackers topped with goat cheese and fresh chives or tapenade. Scrumptious! Homemade crackers also have an "earthy" organic appeal with the squares' asymmetrical appearance. Topping crackers with dips, cheese, avocado, or tapenade creates an aesthetic tower of textures, shapes, colors, and flavors. 

Beet and Carrot with Herbs Gluten-Free Crackers

Keep an eye on these crunchy crackers in the oven. The thinner the rolled-out dough, the crispier the crackers will become when baked. The end crackers seem to get a tad crispier than the middle squares, so watch crackers past 15 minutes to avoid burning. 

Beet, Carrot, and Herbs Gluten-Free Crackers will keep for about a week in an airtight container but may start to lose their crunch after a few days. 

Still craving the beet? Serve Beet, Carrot, and Herbs Gluten-Free Crackers with Beet Walnut Dip, Beetroot and Garlic Hummus, or Beet Walnut Pesto

Are you a fan of homemade crackers? What are your favorite DIY cracker ingredients? Comment below. I look forward to hearing from you! 


BEET, CARROT, AND HERBS GLUTEN-FREE CRACKERS RECIPE


beet carrot & Herbs Gluten-free crackers.jpg

INGREDIENTS

  • 2 cups almond flour (or gluten-free all-purpose flour)

  • 1 cup flax meal

  • 2 tsp each (dried): oregano, cumin, turmeric, dill, salt, onion powder

  • 1 tsp black pepper

  • 2 tsp fresh thyme, finely chopped

  • 1 small-medium raw beet, peeled and grated*

  • 1 medium-large raw carrot, peeled and grated

  • 2 eggs (preferably cage-free vegetarian-fed)

  • 2 tbsp extra-virgin olive oil

*For an easy no-mess option, replace raw beetroot with 2-3 tsp pressed beet powder. 

Optional Additional Ingredients

Bragg's nutritional yeast; crumbled seaweed; sunflower, chia, or sesame seeds; chili powder; fresh cilantro, finely chopped; fresh parsley, finely chopped; Parmesan or Asiago cheese, grated

DIRECTIONS

1. Preheat oven to 350 F degrees. 

2. Combine almond flour, flax meal, and spices in a large mixing bowl.

3. Finely grate beet and carrot. Add to dry ingredients and mix well. 

4. Add in olive oil. 

5. Whisk eggs and pour over dry ingredient mixture. Stir all ingredients until a dough is formed. 

6. Roll dough into a large ball and place on a parchment-lined baking sheet. 

7. With another sheet of parchment, cover dough. Using a rolling pin, roll out dough into a 1/4-inch thick layer. 

8. Score dough with a knife. 

9. Bake crackers for 15-20 minutes. 

10. Let cool and break crackers into squares. 

11. Serve with hummus, salsa, or your favorite cheese spread. Enjoy! 


STILL HUNGRY?

Beet-Pickled Deviled Eggs (Gluten-Free)

Beet-Pickled Deviled Eggs

Beet-Pickled Deviled Eggs are gorgeous, easy-to-make, and perfect for brunch, snack-time, or picnicking.

The idea of serving eggs poached, seared, and stuffed dates all the way back to 61 A.D.! However, the "deviled" eggs style we are familiar with today in America, gained popularity post-World War II due to the commercialization of mayo. Usually stuffed with a mixture of mayonnaise, mustard, and paprika, deviled-eggs are seen at most potlucks, barbecues, catering events, and even at 5-star restaurants.

WHY ARE EGGS “DEVILED”?

According to The Ancient History of Deviled Eggs, "The first known printed mention of ‘devil’ as a culinary term appeared in Great Britain in 1786, in reference to dishes including hot ingredients or those that were highly seasoned and broiled or fried. By 1800, 'deviling' became a verb to describe the process of making food spicy." Isn't history fascinating? 

THE BENEFITS OF BEET-PICKLED DEVILED EGGS?

Traditional deviled-eggs are already quite charming, but after a beet-brine bath, this beloved appetizer becomes even more delightful with its strikingly pink hues and uniquely tangy taste! The sweet and earthy red beet not only creates a vibrant color, but the fabulous veggie also beautifully balances the mayo, mustard, and smoked paprika. Plus - beets are quite healthy and that crimson/pink color is packed with antioxidants. Why not get a little extra nutrition with your favorite snack?

beet pickled deviled eggs 3.jpg

LET’S CHAT EGGS!

If possible, track down vegetarian-fed cage-free eggs. A big advocate for humanely-raised animals, currently, my favorite eggs are from Vital Farms (certified humane) housing pasture-raised chickens. Each carton of eggs even comes with a special monthly newsletter showcasing one of the farm's "chicks."

Looking for a vegan option? Try a delicious eggless mayo by Plant Based Folk. This amazing mayonnaise is vegan, gluten-free, egg-free, and easy to make!

For more fabulous picnic appetizers, try: Beet, Purple Cauliflower, Ginger Vegan Raw-Slaw and Goat Cheese, Beet, and Roasted Parsnip Dip

In the mood for more Easter fun? Stop by and learn how to naturally dye eggs with beets, blueberries, turmeric, coffee grounds, green tea, and more! 

What are your favorite deviled-eggs ingredients? Have you pickled eggs before? Comment below!


BEET-PICKLED DEVILED EGGS RECIPE (GLUTEN-FREE)


BEET PICKLED DEVILED EGGS (005).jpg

INGREDIENTS

for filling

  • 1/4 cup mayo (look for gluten-free on label and use low-fat mayo for a reduced fat option)

  • 1 tsp Dijon mustard (look for gluten-free on label)

  • 1 tbsp dill weed

  • 1/2 tsp cumin

  • 1/4 tsp smoked paprika

  • 1 tsp fresh lemon juice

  • salt and pepper to taste

optional toppings for flair

olives, celery, chives, cilantro, cucumber, curry powder, jalapeno

*DIY pickled-beet brine is easy to make using this recipe: Pickled-Beets. To save time, pick up a 16-oz jar of pickled-beets from your local market and use the brine from the jar. Easy peasie!

Use leftover pickled beets for Pickled-Beet Grilled Paninis with Goat Cheese, Apples, and Basil

DIRECTIONS

1. POUR beet brine into a large heat-safe jar or bowl (optional-including beet). Add cooled hard-boiled eggs, stir, and refrigerate at least 4-5 hours or overnight for a darker shade of pink and stronger pickled flavor. The longer eggs marinate, the more pickled the taste! Pictures above feature eggs marinated overnight. 

2. REMOVE pickled-eggs from brine; pat dry with paper towels. Beet-Pickled Eggs may stain your hands and clothes, so patting eggs dry helps eliminate pink everything! 

3. Cut eggs in half (length-wise) and gently scoop out yolk. In bowl, MASH yolks with fork. Add remaining filling ingredients and mix well. 

4. SPOON or PIPE (about 1 heaping tbsp) yolk mixture into egg white halves. 

5. GARNISH with toppers and season with salt, pepper, and extra smoked paprika (if desired). Pickled-beet brine contains salt, so the filling does not need a lot of extra sodium. 

6. Deviled eggs can be made up to 12 hours ahead. Cover and REFRIGERATE


STILL HUNGRY?

Easy Roasted Beets with Crumbled Gorgonzola

Looking for an easy and tasty veggie side-dish? Give some love to beets! Beets are nutritious, beautiful, and delicious. This Easy Roasted Beets with Crumbled Gorgonzola recipe from Your Daily Food Choices is fantastically simple and filled with flavor, an absolute dream for the beet AND Gorgonzola lovers. Not a blue cheese fan? Substitute feta or goat cheese. 

Roasting beets is a unique way to transform the beetroot's quirky and subtle taste, creating a smoky and sweet flavor with a satisfying al dente crunch (if not roasted too long). Topped with olive oil, sea salt, and pepper, roasted beets provide a fabulous side dish. 

For the beet enthusiasts looking for ways to eat more beets, visit Eating the Beet from Root to Leaf and peruse over 20 delicious recipes and tips on preparing beetroot, beet stems, and beet leaves. What is your favorite way to roast beets?


EASY ROASTED BEETS WITH GORGONZOLA RECIPE


Easy Roasted Beets with Crumbled Gorgonzola.jpg

INGREDIENTS (serves 6) 

  • 8 to 10 small to medium beets, about 2 bunches with greens*

  • 1 tablespoon olive oil

  • Salt and pepper to taste

  • 2 tablespoons crumbled Gorgonzola for garnish

How-to Prepare Beet Greens & Stems

*Beet greens are delicious, nutritious, and diverse. Save the greens and stems to create Superhero Sauteed Beet Greens or Quick-Pickled Beet Stems.

Beet greens and stems can also be steamed in soups or blended raw in smoothies.  

DIRECTIONS

1. Preheat oven to 400 degrees Fahrenheit.

2. Wash & scrub the beets. Remove tops, leaving 1 inch of stem. Save tops and make sautéed beet greens. Cut off beetroot tails.

3. Place cleaned beets onto a baking tray. Roast beets until tender for 40 to 60 minutes, depending on size of beets.

4. Remove from oven and let cool enough to handle. Peel the beets and slice into rounds or wedges.

5. Place beets into serving dish. Reheat in microwave if needed. Garnish with crumbled Gorgonzola. Enjoy!

Photo and Recipe Contributed by Your Daily Food Choices. 


STILL HUNGRY?

Roasted Beet and Parsnip with Herbs and goat cheese Dip

Beet and Parsnip Herb Dip

On a quest to create delicious dips for snacking? This Goat Cheese, Beet and Roasted Parsnip with Herbs Dip is healthy, flavorful, and creamy. Grab some chips, veggies, or a fresh baguette and dig in! 

Do you cook with parsnip? For a vegetable, parsnip (closely related to the carrot) does have a high sugar content, but it's also filled with health benefiting vitamins, minerals, fiber, and phyto-nutrients. Fresh parsnip is an excellent source of Vitamin C, a water soluble vitamin that helps the body maintain healthy connective tissue, boost immunity, and protect against free radicals. Another fabulous health benefit of the parsnip is that it contains many B-complex vitamins, including folate (Vitamin B9).  

Drop the beet into the mix, and this dip is a powerhouse of folate nutrition! Red beets provide a significant amount of folate which contributes to a healthy nervous system and synthesis of red blood cells. Folate is also crucial for developing healthy tissues, such as those of a fetus, and rapidly regenerating cells. Pregnant women need a high amount of folate in their diet, so snacking on a beet and parsnip dip is a great way to give the body healthy nutrients during pregnancy. 

Beet and Parsnip Herb Dip with Love Beets

Besides the fabulous health benefits, Goat Cheese, Beet and Roasted Parsnip with Herbs Dip contains a beautiful blend of flavors. Goat cheese  (or authentic Feta) is creamy and salty.

Roasted parsnips and cooked red beets offer a subtle smokey sweet flavor, and the herbs (fresh rosemary and thyme) provide an aromatic earthy pine taste that complements root vegetables, goat cheese, and toasted walnuts. Enjoy!

New to cooking with parsnip? Stop by Vermilion Roots for Christine's delicious Winter Vegetables in Coconut Milk (Bubur Cha Cha).

What are some delicious ways you use parsnip? Do you have a favorite go-to dip for snacking? Comment below. I would love to hear from you. 


Beet, Roasted Parsnip and Goat Cheese Herb Dip Recipe

beet parsnip and herbs with goat cheese dip.jpg

INGREDIENTS

  • 4-5 small beetroots*

  • 3 medium parsnips, washed and peeled

  • 1/4 cup walnuts, chopped (toasted, optional)

  • 1/3-1/2 cup goat cheese or authentic Greek feta

  • 2 tbsp olive oil

  • 2 tsp chopped fresh thyme, plus more for garnish

  • 2 tsp chopped rosemary, plus more for garnish

  • salt and pepper to taste

*If using fresh beets, roast 3-4 medium beets for about 30-35 minutes until tender. Remove skins if desired. If using ready-to-eat baby beets, use 4-5.

This is not a paid or sponsored review. I promote everything BEETastic, and although I prefer using fresh beets, I also appreciate and support Love Beets' pre-cooked ready-to-eat beets because they allow everyone to enjoy healthy beets without the mess and fuss.

DIRECTIONS

1. Preheat oven to 425 F degrees. 

2. Toss parsnip with 1 tsp olive oil. Wrap in aluminum foil (enclose with parchment paper in-between foil and parsnip if not a fan of aluminum foil) and roast for about 25 minutes. If roasting beets (not using ready-to-eat baby beets, such as Love Beets), follow these roasted beet directions.

3. Remove parsnips and/or beets from oven and cool. 

4. Toss all ingredients into food processor and blend until smooth. 

5. Garnish with extra goat cheese, thyme, and rosemary. 

6. Serve dip with a fresh baguette, veggies, or rice (gluten-free) crackers.


STILL HUNGRY?

Superhero Sautéed Beet Greens

Photo Credit: Bless Her Heart

Photo Credit: Bless Her Heart

Are beet greens edible? Heck yes! The beet's luscious "locks" (beet leaves) are delicious and nutritious containing superhero nutrients, such as Vitamin K, Vitamin A, Vitamin C, Magnesium, Calcium, Zinc, and Iron. Plus - they are filled with fiber. 

Although many people are familiar with eating the root portion of the beet, historically beet greens were consumed more than beet roots. Comparable to the flavor and texture of Swiss chard, beet greens are quite versatile. Add raw beet greens* to salads and smoothies or sauté greens as a side dish. Sautéing beet greens with olive oil or toasted sesame oil, garlic, and lemon juice creates a perfect side dish to Beet-Glazed & Fennel Salmon or Beet Black Bean Burgers.

Don't forget to use the beet stems too. The beet is edible from root to leaf; beet stems are filled with nutrients and provide a satisfying crunch. Not sure what to do with beet stems? Try easy Quick-Pickled Beet Stems. Give Some Love to Beet Greens! Your Body Will Thank You


SUPERHERO SAUTEED BEET GREENS RECIPE


superhero sauteed beet greens.jpg

INGREDIENTS

  • 1 bunch beets (about 4 beets) with lush green tops attached

  • 1 tbsp olive oil

  • 2 large garlic cloves, thinly sliced or minced

  • 1 tsp fresh lemon juice

  • kosher or fine sea salt

  • freshly ground pepper

 Optional Seasonings and Ingredients

  • Cayenne, red pepper flakes, smoked paprika, cumin, ginger, basil, oregano, coriander, raw cacao, and curry pair well with beet greens.

  • Red wine vinegar or apple cider vinegar compliment the flavor of beet greens as do gourmet olive oils, such as truffle olive oil and rosemary olive oil. Toasted sesame oil with beet greens is another delicious combination.

 Just Beet It Tip

The flavor of beet greens is comparable to chard and spinach, so flash boiling, steaming, or sauteing the greens reduces the seemingly bitter taste. 

DIRECTIONS

1. Trim off the greens, leaving 1 inch of the stem attached to each root. Reserve the roots for beet recipes.

2. Trim and discard the thick, fibrous stems from the greens and remove any wilted or spotted leaves. See tips for selecting quality beets and beet greens.

3. Stack the leaves, and then cut the stack in half lengthwise through the center vein.

4. Chop the greens crosswise into large pieces, about 2 inches wide.

5. Rinse the greens in several changes of cold water until they are clean and the water is clear.

6. Dry them in a salad spinner or blot dry with paper towels.

7. In a large sauté pan, heat the oil over medium heat and swirl to coat the pan bottom.

8. Add garlic and sauté until soft but not brown, about 1 minute.

9. Add the greens and toss with tongs until wilted but still crisp-tender and bright green, about 3 minutes.

10. Add the lemon juice. Season greens lightly with salt and pepper, and then give the greens a final toss in the pan.

Serve immediately.


*For individuals with existing and/or untreated kidney or gallbladder problems, you may wish to consult your physician before eating large amounts of beet greens. Like many other healthy foods, beets (notably beet greens) contain amounts of oxalates (naturally occurring substances found in plants, animals, and human beings).

Resources

Morgan, Diane. (2012). Roots: The Definitive Compendium with more than 225 Recipes. San Francisco, CA: Chronicle Books LLC. 

Robinson, Jo. (2013). Eating on the Wild Side. New York: Little, Brown and Company.


STILL HUNGRY?

Beetroot and Garlic Hummus (Vegan and Gluten-Free)

vegan and GF Beetroot and Garlic Hummus recipe.jpg

Are you on the hummus bandwagon? If not, jump aboard! Hummus is a super delicious and heart-healthy snack. It seems that the entire world is having a love affair with hummus, which we totally support! In fact, hummus has become so popular, the hummus industry has grown from a $5 million dollar business 15 years ago, to one that totaled $530 million at U.S. food retailers in 2012. Yowza! 

A traditional Middle Eastern dip, hummus is a combination of chickpeas, olive oil, garlic, lemon juice, and tahini (sesame paste). Chickpeas may lower cholesterol, assist in weight management, and help prevent heart disease. About 1/2 a cup of cooked chickpeas provides 6 grams of protein along with 10% iron and 45% folate (percent daily value). Folate is a very important vitamin, especially for pregnant women. Our bodies need folate to help form DNA and create healthy cells. During pregnancy, folate plays a vital role in the production of red blood cells and also helps the baby's neural tubes develop properly.

Add the nutritious beetroot (a folate superstar) and extra virgin olive oil to the mix, and you have the perfect healthy snack filled with minerals, protein, healthy fats, and fiber. Beets are rich with antioxidants and vitamins, so creating a dip with beets is a wonderful way to add more vegetables to your diet (and hopefully your family’s diet). Beetroot and Garlic Hummus’ vibrant color seems magically playful; you may even get your kiddos to fall in love with PINK hummus.

vegean and GF beetroot and garlic hummus.jpg

Hummus is quite easy to make as it consists of only a few ingredients that can be added to a food processor, and VOILA!, you have a delicious healthy dip. You can play with the taste, adding more garlic (for the garlic lovers) and/or more tahini for a stronger sesame flavor.

This dip is always a crowd pleaser, and you can’t go wrong with an assortment of chips, crackers, and dips. Hummus also tastes amazing on bread as a sandwich spread or crostini as a yummy topping.

Spread beetroot hummus on sandwiches and pita bread or use it as a dip with crackers and veggies.  The sweet earthy beet, garlic, lemon, and tahini is a beautiful marriage of ingredients, and most vegetables pair well with this dip. Cauliflower, broccoli, cucumbers, and bell peppers are always a favorite; Jamaica and radishes are delicious too! Gluten-free Late July chips are mild and low in sodium but high in nutrition and taste, so they are perfect for dipping in Beetroot and Garlic Hummus.

For another delicious dip featuring beets and tahini, try Beet and Walnut Dip or a Beet Buddha Bowl with Tahini Lemon Dressing

Looking to make a delicious dip spread or unique charcuterie board? Serve Beetroot and Garlic Hummus along with an absolutely scrumptious Garlic Dipping Sauce (Lebanese Toum) by Plant Based Folk. This authentic and easy dip is super garlicky, vegan, and gluten-free! Pair both dips with your favorite crackers, vegetables, chips, or even toast or sandwich! What is your favorite hummus or dip? Comment below!


VEGAN BEETROOT AND GARLIC HUMMUS RECIPE


INGREDIENTS

beet and garlic pinterest recipe.jpg
  • 2 small-medium roasted beets (or use LOW SODIUM CANNED BEETS for easy preparation)

  • 1 15 oz. can (1 3/4 cup) cooked chickpeas, mostly drained

  • juice of half a large lemon

  • 2-4 large cloves garlic, minced (2 is subtle/4 is strong)

  • 2 heaping tbsp tahini

  • 1/4 cup extra virgin olive oil

  • 1 tsp cumin

  • a dash of oregano olive oil (OPTIONAL)

  • pinch salt and black pepper (to taste)

DIRECTIONS

1. Roast or steam beetroots.

2. When beets are cooked and cooled, place in food processor. Skins are edible, so feel free to blend the beetroot skins and all! Blend until only small bits remain.

3. Add remaining ingredients except for olive oil and blend until smooth.

4. Slowly drizzle in olive oil and keep mixing. 

5. Taste, adding more salt, cumin, garlic, lemon juice, or olive oil as needed. If it’s too thick, add a bit of water.

6. Hummus usually keeps in the fridge for up to a week. 


STILL HUNGRY?

Rosemary and Garlic Beet Chips

rosemary and garlic beet chips.jpg

Are you looking for new ways to use beetroot in your kitchen or have a hankering for a crunchy and healthy snack? Bake a batch of Rosemary and Garlic Beet Chips. Beet chips are delicious and filled with vitamins, minerals, fiber, and antioxidants; snack to your heart's content! 

I am a self-proclaimed "snacker." This obsession with crunchy, salty, and savory snacks started as a child. In family photo albums, there is a good chance that my side-kick snacks make appearances in most of my pictures. There are photos of me holding Fruit Roll-ups while perched on rocks in the desert, eating a granola bar in the backseat of our station wagon, or carrying pretzels around the backyard. To this day, I still consistently tote snacks . . . sometimes even on the way to the store to buy more snacks. I am an equal opportunity snack lover, but when craving something crunchy, delicious, healthy, and home-made, beet chips are the perfect snack. What is your experience with home-made chips? 


ROSEMARY AND GARLIC BEET CHIPS RECIPE


Rosemary and Garlic Beet Chips.jpg

INGREDIENTS

  • 2 bunches* Red & Golden Beets (4-5 beets), rinsed and scrubbed

  • 3-4 Tsp Olive Oil

  • Sea Salt & Black Pepper (to taste)

  • 3 Garlic Cloves, minced

  • 4-5 Sprigs Rosemary, roughly chopped (or 2-3 tsp finely chopped rosemary)

2 bunches may seem extreme, but if you are going to invest time in these chips, you may want to make a BIG batch; they will be devoured fast! 

*After removing the beetroot from its stems, save the beet greens for other delicious dishes. Beet greens are nutritious and can be added raw to smoothies, baked as chips, or sautéed with olive oil and garlic. 

Tips for Baking THE Best Beet Chips

  • Drizzle or brush with oil to get crispy chips

  • Arrange sliced beets in single layers

  • Dry freshly cut beet slices to avoid soggy beet chips

  • Use a mandolin (stainless steel is best) for thin, evenly sliced chips

OPTIONAL TOPPINGS

Coconut Oil & Dill, Smoked Salt & Paprika, Bragg's Nutritional Yeast & Chili Powder, Bragg's Liquid Aminos & Ginger, Cinnamon & Sugar

DIRECTIONS

1. Preheat oven to 375 degrees F and place oven rack in the center of the oven.

2. Thinly slice beets (keep skins attached) with a mandolin or a sharp knife, getting them as consistently thin as possible. 1/16" is an ideal thickness. They should curl a little when cut. This will ensure even baking and crispiness.

rosemary beet chips.jpg

3. Divide between two baking sheets and spray or very lightly drizzle with olive oil. Gently toss to coat or apply oil to veggies with a pastry brush. Toss with sea salt, black pepper (to taste), minced garlic, and chopped rosemary. Then arrange in a single layer, making sure the slices aren’t touching.

4. Bake for 20 minutes or until crispy and slightly brown. Rotate pans once halfway through the baking and flip beet chips (if motivated). Be sure to watch closely past the 15 minute mark as chips can burn quickly.

5. Remove from oven and let cool. Then serve. Beet chips are best served fresh from the oven. 

Adapted from The Minimalist Baker. 


STILL HUNGRY?

Beetroot and Ginger Chutney

beet and ginger chutney.jpg

This Beetroot and Ginger Chutney recipe by Amanda Settle, blogger at Olive, Feta & Ouzu is absolutely delightful! Beets are filled with antioxidants, and ginger is full of immunity boosting benefits, so this deliciousness in a jar is both tasty and healthy! 

What is Chutney

Originating in India, chutney is a spicy (or sweet) condiment made of fruits or vegetables with vinegar, spices, and sugar. Beetroot and Ginger Chutney is best served with chips or crackers, various meats, cheeses, fruits, and nuts. The sweet beet paired with spicy ginger makes this chutney a great addition to your favorite charcuterie platter. If like me, you are so in love with this recipe that you cannot wait to slather it on a cracker, you can always eat chutney out of the jar with a spoon! Yup - that's my method. Do you enjoy canning? Chutney can be canned and stocked, ready-to-eat whenever you have a hankering for a sweet and spicy treat.

Spotlight on Blogger: Amanda Settle

Greek Isles resident, expat blogger, and cook and crafter, Amanda Settle writes at Olive, Feta, & Ouzo. I have loved following her journey and learning more about Greek seasonal foods. Besides her delicious food creations and travel stories (tips), Amanda has also adopted abandoned cats and a dog, and any animal lover (to me), is a friend for life! Thanks, Amanda for sharing your fabulous beet recipe. Stop by Amanda's blog for more delicious recipes and adventures in Greek Isle living.  

"I have read they [beets] are also a great antioxidant for the liver so perfect if you like the odd gin & tonic and are over the age of 40!"-  Amanda Settle


BEETROOT AND GINGER CHUTNEY RECIPE


INGREDIENTS

  • 500g beetroot, peeled and finely chopped

  • 1kg green apples peeled, cored and finely chopped

  • 275g red onions, finely chopped

  • 1 thumb fresh ginger, finely chopped

  • 1 tbsp crystallised ginger, finely chopped

  • 350g brown sugar

  • 750ml red vinegar

  • 1tsp allspice

  • 2tsp sea salt

  • 1tsp ground ginger

DIRECTIONS

1. Prepare and chop the vegetables. You can vary the size of chunks depending on how you like your chutney.

2. Place the vinegar, sugar and spices in a large saucepan over a medium heat.

3. Dissolve the sugar making sure that the vinegar doesn’t boil.

4. Add the rest of the ingredients and cook for approx 2 1/2 hours until most of the liquid has disappeared.

5. Spoon into clean, hot sterilized jars and seal immediately.

6. Make sure as they cool that the safety dimple on the lids has depressed; then you know jars have sealed properly.

7. They will be edible after 3 weeks but better after 6 and will keep unopened in a cool dark place for about a year.

8. Once opened, keep in the fridge and chutney should last at least a month.

Recipe and Photo by Amanda Settle.


STILL HUNGRY?

Roasted and Pickled Heart Beets

Pickled Heart Beets Various Varieties.jpg

Roasted and pickled heart beets are delicious and fun! They can be added to salads, used as a topping on fresh tacos or crostini appetizer, served as a flavorful side-dish, or arranged as a garnish for your favorite beet cocktail or mocktail.

You can pickle beets raw or cooked for various “crunchy” textures and also create different shapes using a small heart or star cookie cutter. Plus- using fun shapes may be one way to get your kiddos to eat pickled beets. Well- you can try!

My grandma Grace was a phenomenal cook. She would dance around the kitchen humming a tune, while baking her favorite pies, cookies, and bierocks (German yeast-raised rolls that are filled with a savory filling). She loved cooking and baking, and wow, could she eat!

Besides my grandma’s delicious breads and cookies, she also cooked tasty and savory vegetables, served raw, boiled, or pickled. Grandma Grace made THE most delicious pickled beets, filled with flavor and crunch. These pickled heart beets are an homage to my grandma’s pickled foods, a classic recipe incorporating the deliciousness of traditional pickled beets along with playful shapes.

Pickled Heart Beets - perfect for Valentine's Day or any day!

Batches of pickled beets will vary depending on which beet varieties and types (see image above) are used for pickling. Chioggia Beets are pink and white striped while red beets, such as Detroit Red or Ace are crimson and sometimes purple in color. Golden Beets are bright yellow when raw becoming slightly subdued in color after cooking. White beets are also fun to pickle, if you can find them in season. If you don’t have the time to pickle beets, you can make fun shapes with ready-to-eat cooked baby beets, often found in the produce section in local markets. For easy roasting prep, check out our 6 Easy Tips for Preparing and Cooking Beets Without a Mess!

If possible when pickling, use Bragg's Apple Cider Vinegar for its flavor and health benefits. Apple Cider Vinegar has many uses and can be very beneficial for health, such as balancing blood sugar, boosting immunity, improving nutrient absorption, promoting healthy cholesterol, and aiding digestion.

Looking for fun heart beet recipe ideas? Try these yummy recipes:


ROASTED AND PICKLED HEART BEETS RECIPE


roasted and pickled heart beets.jpg

INGREDIENTS

for the pickled beet brine

  • 2 cups of water

  • 1/2 apple cider vinegar

  • 1-1/2 tablespoons kosher salt (flavor to taste)

  • 1-2 tablespoons maple syrup

  • 3-4 whole all-spice pods

  • 1 teaspoon coriander seeds

  • 1 tbsp dill (fresh dill is best)

  • 6 cloves garlic, smashed

  • 1 teaspoon Mexican oregano

  • 1 teaspoon red chili flakes (flavor to taste)

*If using golden beets, substitute the oregano and coriander for rosemary and a little lemon zest.

DIRECTIONS: Pickled Heart Beets

  1. Place beets in a large pot with water to cover on the stove.

  2. Bring to a boil and cook beets until tender (about 20 minutes depending on the size of the beets).

  3. Drain the beets, cool and peel.

  4. Cut shapes using tiny cookie cutters (if preferred) or quarter beets to preferred size.

  5. Put your beets in a mason jar. 

  6. Bring the brine to a boil on the stove. 

  7. Pour the hot brine over the beets until the jar is full. 

  8. Close up the jar, letting it cool completely before putting it in the fridge.

  9. Eat within a week or two. These aren’t canned/preserved pickled beets, and they will expire.

DIRECTIONS: Roasted Heart Beets

  1. Preheat oven to 375° F.

  2. Gently rinse beets and trim off stems and leafy tops (save for a delicious sautéed beet greens appetizer or pickled-stems side-dish).

  3. Wrap each beet loosely in aluminum foil and place in the middle of oven.

  4. Roast beets until tender and easily pierced with the tip of a knife, about 30-35 mins (roasting time may vary based on size of beetroot).

  5. When beets are cool enough to handle, thinly slice beetroot and then cut shapes using tiny cookie cutters (if preferred). Save the remaining beet portions for salads or smoothies.


STILL HUNGRY?

Roasted Beet, Pear, and Goat Cheese Tart with Honey and Thyme

Beet, Pear, and Thyme Tart with Honey and Goat Cheese

This Beet and Pear Tart with Goat Cheese, Honey, and Thyme is an absolute delight for the taste-buds! The vibrant red beet introduces a gorgeous splash of color and flavor combined with the sweet crisp pear and savory cheese.

Store-bought puff pastries are not my typical "go to" baking items as I am an advocate for fresh non-packaged foods (preferably gluten-free); however, life can be unbelievably busy (especially around the holidays), and sometimes we need an easy peasie no fuss recipe. This is it! These tarts are delicious and perfect for a unique and fun appetizer.

'Tis the season of joy and gratitude, and I am so thankful for family, love, and a blessed full belly. While visiting my wonderful mother and my 100-year-old grandpa in Wisconsin, this appetizer was birthed. Although not a passionate beet lover, my beautiful mother is an amazing supporter, and with an adventurous spirit, she always tries my beet dishes. This Beet and Pear Tart is now one of her favorite appetizers.

Thyme is the perfect herb for this appetizer as its subtle fragrance compliments the beet, pear, and cheese. Besides its delicious flavor, thyme offers outstanding health benefits

beet pear honey and goat cheese tarts SM.jpg

Thyme helps preserve foods and protects them from microbial contamination. Adding more thyme to your foods, especially raw produce, will help ensure your food is safe to eat! Additionally, this amazing herb can help heal chest and respiratory problems including coughs, bronchitis, and chest congestion. Plus, as a nutrient-dense herb, thyme contains vast nutrients, such as Vitamin C and Iron. 

Roasted Beet, Pear, and Goat Cheese Tarts can be baked any shape (this recipe uses 4x4 squares and small circles) and are best served with love and drizzled with local honey. Using a mandoline slicer will help keep the beets sliced thinly; however a pairing knife works well too. Slice pears in halves or in circles to match the sliced beets.

Looking for more tasty appetizers? Try Beet Walnut Pesto with Parmesan Bagel Chips (GF) or Beet and Goat Cheese Terrine.


Roasted Beet, Pear and Goat Cheese Tarts with Honey and Thyme Recipe


Beet Pear and Goat Cheese Tarts.jpg

INGREDIENTS

  • 1 sheet frozen puff pastry, thawed and cut into six 4 inch rounds or squares (or as already packaged)

  • 2 small- medium red beets*, cooked, peeled and thinly sliced

  • 1-2 small pears, cored and thinly sliced

  • 8 oz goat cheese (or cheese alternative)

  • 1/2 tsp fresh or dried chopped thyme

  • Coarse salt and ground pepper (to taste)

  • Local honey (to taste)

  • 1 egg + 1 teaspoon water, beaten (optional)

*For a quick option, use packaged ready-to-eat organic cooked beets, such as LoveBeets. 

DIRECTIONS

1. Preheat oven to 350 degrees.

2. Roast beets (wrapped in aluminum foil) for about 20-25 minutes.

3. Place pastry rounds or cut 4 x4 squares on a parchment-lined baking sheet and prick all over with a fork.

4. Brush each tart with the beaten egg wash (optional). The egg wash helps tarts achieve a golden crispy texture.

5. Divide half the cheese among pastry rounds. Spread a thin layer of goat cheese on each tart for a bottom layer or loosely sprinkle. Top each tart with 1-2 pear slices.

6. When beets are cool enough to handle, remove skins. Using a mandolin or sharp pairing knife, slice the beets into 1/4-inch slices. Add 1-2 beet slices atop pear slices and then top with additional pear slices and remaining cheese.

7. Sprinkle with thyme and season with salt and pepper.

8. Bake until pastries are golden brown and slightly puffed, about 15 minutes*. Serve warm or at room temperature.

9. Drizzle with honey for extra flavor.

*Oven temperatures vary. Follow baking directions on puff pastry package or bake at a low temperature and watch tarts for golden brown hues. 


STILL HUNGRY?

Beet Walnut Pesto with Parmesan Bagel Chips (GF)

Beet+and+Walnut+Pesto+with+Gluten-free+Bagel+Chips.jpg

If you are like me, a lover of bright-colored tasty foods that crunch, this Beet Walnut Pesto with Parmesan Bagel Chips (gluten-free) offers the perfect blend of flavors and snack-worthy crunch. Besides the absolutely delicious combination of basil, beets, and walnuts, the ingredients offer "jump for joy" health benefits. Short of licking the food processor's blades, my husband and I devoured an entire batch of this pesto in one sitting. Yes - it is THAT tasty! 

Basil

According to studies at Purdue University, basil contains high levels of antioxidants along with anti-inflammatory and anti-aging properties, helping us reduce inflammatory diseases and risks of cancer. Basil may also lessen the progression of asthma, osteoarthritis, and rheumatoid arthritis. These are some extraordinary reasons to eat more basil! 

Red Beets

High in antioxidants, vitamins and minerals, the red beet contains a unique source of the phytonutrient, betalain which contributes to detoxifying the liver and protecting the body from oxidative stress that often leads to aging and disease. The red beet also improves cardiovascular function and increases athletic performance. High-fives for beets! 

beet and walnut pesto.jpg

Walnuts

These delicious nutrient-dense nuts are high in plant based Omega-3 fats which improve cardiovascular function. Walnuts may also help balance weight control and improve brain function. If you don't have a nut allergy, go "nuts" for walnuts! 

This pesto is perfect atop gluten-free bagel chips or crackers, or use this pesto as the sauce for your favorite pasta. Beet pesto with edamame noodles is an absolute delight!

Have you tried beet pesto? We would love to hear your thoughts.


Beet Walnut Pesto with Bagel Chips (Gluten-Free) Recipe

beet walnut pesto with bagel chips gluten-free.jpg

INGREDIENTS

  • 2 medium red beets, cooked and peeled

  • 2 garlic cloves

  • 1/4 cup chopped walnuts (or pine nuts), toasted

  • 3/4-1 cup fresh basil

  • 1/4 cup olive oil

  • 1/3 cup fresh grated Parmesan cheese*

  • salt and pepper to taste

*For a vegan option, use Bragg's Nutritional Yeast in place of cheese. Nutritional yeast is high in vitamins, especially Vitamins B6 and B12!  

Easy Prep Tips

Pressed for time? Use LoveBeets or other organic pre-cooked packaged beets (non-marinated). To cook beets: Gently wash beetroots, wrap in aluminum foil, and cook for about 30-35 minutes at 350 degrees. Beet cooking time varies on beet size. Beet skins are edible but if you prefer to peel the beetroots, wear gloves to avoid pink fingers or gently rub off skins under cool water. 

*There is a variety of gluten-free crackers and chips available in grocery stores or online. I love gluten-free rice crackers or almond Nut-Thins by Blue Diamond. For this recipe, I used Glutino Gluten-free Bagel Chips.

DIRECTIONS

1.  Pulse all ingredients in food processor starting with beets, walnuts, garlic, and basil. Slowly drizzle in olive oil and other ingredients until fully blended. 

2. Top gluten-free bagel chips* (found at local grocery store), crackers, or toasted French bread with tsp or more of beet pesto. 

3. Garnish with more grated Parmesan, chopped walnuts, or chopped basil. Pine nuts rather than walnuts also work well. 


STILL HUNGRY?

Quick-Pickled Beet Stems

quick+pickled+beet+stems.jpg

Beets are delicious and nutritious from root to leaf! Rather than throwing away the beautiful beet stems from your bunches of beets, create a vibrant pickled beet stems side-dish.  

Beet Stems Offer Health Benefits

Filled with nutrients, such as betalain (what gives the beet its beautiful color that leaks onto counters, hands, and cutting boards), beet stems are a powerful source of antioxidants, reducing inflammation and oxidative stress (both linked to heart disease).  Also high in fiber and minerals, beet stems are nutritious and versatile in recipes.

Stems may be blended in smoothies (with a quality blender), juiced with fruits and veggies, sauteed with seasonings, or steamed in soups. 

When eaten raw, the stems have a satisfyingly refreshing crunch like biting into a cold pickle or crisp celery stick. Although the stems may have a slight bitter flavor for some, the pickling ingredients enhance the stems' unique taste. This is one of the many beet recipes that I loved preparing for my grandpa (an avid beet eater) who lived to be 100 years old! Although he loved eating the beet from root to leaf, quick-pickled beet stems was a new dish for him to experience, and he adored it. A side of beet stems is the perfect addition to my grandpa's favorite meal: mashed potatoes and roasted chicken.

quick pickled beet stems .jpg

Quick-pickling is an easy process and allows the stems to quickly soak up the flavor of vinegar and herbs without having to can and preserve the stems. You will want to eat this recipe within the day of making. Truly - these stems are so delicious that they won’t last long on the table anyways, but quick-pickled stems are best when eaten within a few hours or day of pickling; otherwise, if soaked too long, the stems become tough and chewy. They are still delicious, but since stems are quite fibrous, their texture changes after a day of being soaked in brine.

Not sure what to do with beet greens or beets? Stop by "Eating the Beet from Root to Leaf" for more ideas on eliminating food waste and enjoying the amazing beet from its root to its gorgeous leaves.  Plus- you can peruse an index of over 20 un"BEET"able recipes.  Enjoy! 

Looking for more deliciously pickled vegetable recipes that are ready in a few minutes, try these scrumptious Mexican Pickled Onions from M.A. Kitchen. These pickled onions are an incredibly easy and taste amazing.


QUICK-PICKLED BEET STEMS


quick pickled beet stems.jpg

INGREDIENTS (2-4 servings as a side dish)

  • Stems from 1-2 large bunch of red and/or golden beets*

  • 4 Tbsp red wine or apple-cider vinegar

  • 2 tsp sugar or honey

  • 1/2 tsp salt (add more to taste)

  • Freshly ground pepper

  • 2 sprigs of thyme, rosemary, or anise

*Stem colors will vary due to diverse beet varieties. 

DIRECTIONS

1. Cut stems on the bias into ¼-inch slices. Place stems in a small bowl.

2. Bring vinegar to a boil in a small saucepan. Stir in sugar or honey, salt, pepper, and sprigs of herbs; pour over stems, removing sprigs if desired when serving.

3. Let stand at least 20 minutes. Yields ½ cup.

COOKING TIP: Quick-pickled stems are best when eaten within a few hours or day of pickling; otherwise, if soaked too long, the stems become tough and chewy.


STILL HUNGRY?

Beet and Goat Cheese Terrine

Receive endless high-fives and hugs from family, neighbors, friends, and strangers when serving this Beet & Goat Cheese Terrine at your next meal, party, or barbecue. This fabulous appetizer is delicious, nutritious, and stunningly vibrant. 

I am a goat cheese junkie, and although I limit my dairy intake, I cannot deny my attachment to cheese, especially goat cheese. Add the sweet earthiness of beets with a subtle savory goat cheese and magical inspiration always ensues! 

Featured on Bourbon and Blueberries, this recipe and blog titled "Eeew, Beets," addresses the many beet non-enthusiasts who perhaps are looking for a way to incorporate more beets into their diet. For all the beet lovers, this unique appetizer showcases the beetroot's earthy sweetness and distinct flavor. Yum! Beets are incredibly diverse, and this is one of many delightful and creative ways to serve beets. Add sprigs of basil, cilantro, or parsley for color and flavor. 


Beet and Goat Cheese Terrine Recipe


beet and goat cheese terrine appetizer.jpg

INGREDIENTS

  • 4 large beets (preferably golden or red beets)

  • 1 large roll of goat cheese (about 11 oz)

  • 1/3 cup of olive oil

  • 1 large clove of garlic

  • zest and juice of half a lemon

  • good quality salt and pepper

 The Process

Layer beets, goat cheese, and the seasoned olive oil; then press everything together. Use toothpicks to keep the layers together.

According to Cassidy, "Don't worry about making your layers perfect, the imperfections is what makes them so pretty."

The longer terrines sit in the fridge, the more the colors blend together. You could easily get away with making this two days in advance. 

DIRECTIONS

Step One:

Boil your beets with the skin on until they are tender all the way through (at least a half hour) or steam beets for 15-20 minutes. When beets are cooked, the skin should wipe right off. When the beets have cooled, peel the skin off and slice them as thinly as you can with a very sharp knife or mandoline slicer. 

Step Two:

1. In a small bowl, combine crushed garlic, lemon zest/juice, and olive oil.

2. Brush the bottom of a bread baking tin with the olive oil and start with a layer of yellow (golden) beets.

3. Sprinkle with salt and pepper and spoon on a layer of goat cheese. After the cheese, add a layer of red beets and another layer of the olive oil. Make sure your top layer is beets not cheese. 

4. When you are finished, brush the top layer with the remaining olive oil and cover with plastic wrap. Press the beets down with your hands. Do it firmly but not so hard you dislodge the layers. Leave it covered in the fridge for a few hours before you try to cut into it. Chilling overnight is best!

5. To cut the terrine, use a very sharp knife. Putting toothpicks in the cut portions before taking them out of the pan makes it easier to get them to the plate in one piece.

Recipe and photo by Catherine Cassidy, creator of Bourbon and Blueberries. 


STILL HUNGRY?